Tuesday, September 9, 2014

Ginger Peach Cake


Ginger Peach Cake


The secret to this cake is buying the best peaches possible.  I wait every year for Local Peaches to come in season.  They are so addictively delicious.  I sauté the peaches in butter and a little ginger and sugar.  The Peaches are inside the cake, in between the layers, and on the outside.


INGREDIENTS:

Sautéed Peaches (x2 all items)
1 ½ lbs (about 3 cups) sliced peaches for inside of cake.
2 tablespoons unsalted butter
1/2 cup sugar
1/2 teaspoon ground ginger
a pinch of kosher salt or sea salt
Double these ingredients when you buy them because you do 3c for inside and 3c for in between the layers. 
If you want more peaches for decorating the outside of the cake you need to buy more as well. Sometimes I do, sometimes I don’t.  Depending upon my mood.

For the Cake:
1 1/2 sticks of butter, softened
1 1/2 cups sugar
4 eggs, at room temperature
3 cups unbleached white flour
1 1/2 teaspoon baking powder
1 1/2 teaspoons baking soda
1/2 teaspoon kosher salt or sea salt
1 1/2 cups sour cream
1 tablespoon pure vanilla extract
1 ½ lbs of peaches (cooks down to about 1 ½ cups cooked peaches (note:  1 ½ lbs is about three cups of fresh cut peaches which will then cook down to about 1 ½ cups. -- Also remember to reserve the liquid from the cooked peaches for the frosting.

For the Frosting:
1 ½  8-ounce block of cream cheese, softened
1 ½  sticks of unsalted butter, softened
1 ½  lbs powdered sugar
1/4  cup of peach syrup (liquid after you cook the peaches)
(if you like A LOT of frosting in between your layers and on top do 2 cups/lbs/ sticks of cream cheese, butter, and sugar instead of 1 ½ )


SAUTÉ PEACHES FOR THE INSIDE OF THE CAKE: 
(You can of course sauté all your peaches together at the same time when you make them in between the layers as well, but I like to do them separate so I have the right amount of liquid.)
Peel and cut your peaches.  Peaches are going inside the cake so you can decided if you want larger or smaller slices.  Heat a large skillet to medium high heat.  Add butter and peaches.  Sprinkle with sugar.  (if the peaches are not naturally sweet you may need more sugar.  The peaches I use are very sweet and only need a little 
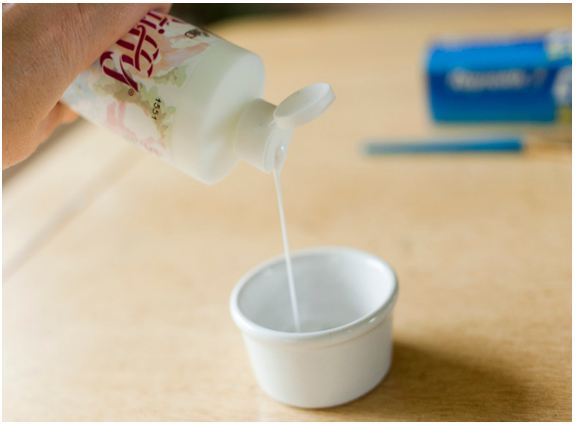
sugar)  Add ground ginger and a pinch of salt.  Drain liquid. Set both aside to cool.  Don’t throw away liquid.

FOR THE CAKE: 
Preheat oven to 350 degrees F.  Butter and flour 2 8-inch-round cake pans.  Set aside.
In a mixing bowl cream together the butter and the sugar until light and fluffy.  Add the eggs one at a time, mixing them completely into the butter mixture after each addition.
In a separate bowl combine all of the remaining dry ingredients:  flour, baking powder, baking soda, and salt.  Mix or sift together well.  Add the dry ingredient mixture alternately with the sour cream.  Stir in the vanilla extract.
Fold in 1 1/2 cups of the cooked peaches into the cake batter.  Divide batter evenly between cake pans.  Baked for 40 to 45 minutes or until toothpick inserted in center comes out clean.  (While the cake is cooking I usually sauté my peaches for in between the layers) 
Remove cakes from oven and let cool for 10 minutes. Then invert onto cooling racks to finish cooling.
SAUTÉED PEACHES FOR IN BETWEEN THE LAYERS:  
Peel and cut your peaches.  Heat a large skillet to medium high heat.  Add butter and peaches.  Sprinkle with sugar, ground ginger, and a pinch of salt. Separate into 3 different bowls equally. (Don’t drain the liquid like before, you need it this time!) 

FROSTING:
With the paddle attachment mix together your cream cheese, butter, and powdered sugar in your mixer until well blended.  Mix in reserved peach syrup from your cooked peaches. This step is up to you.  It depends on the consistently you want your frosting.  If you need yours a little more stiff add more powdered sugar if not add more peach syrup.

ASSEMBLING THE CAKE:
After your cake is cooled (you can also freeze it for later) cut each layer in half so you have 4 layers.  You can do it with a knife or use my mom’s string technique. J
(Now if you don’t want to cut your layers, you don’t have to. You can just have 2 larger layers.  Maybe I’ll try that next time.  You can really do it however you want.)
Put a little frosting on the base of your cake stand/platter for a “glue”. 
Lay down your first layer and take a chop stick (or whatever tool you want) and poke your cake all over. 
Then take 1 of your sautéed peach bowls (with the syrup) and scatter over the layer evenly.  Try to keep the juice an inch away from the edge so they don’t get too soft. 
Take your frosting and spread it over the peaches CAREFULLY.  I usually dollop the cream cheese over the peaches in different places so when I spread it, it doesn’t pull up the peaches too much.
Add your next layer and repeat the last step until all your layers are on.  Once you’re down to placing your top layer I like to turn it upside down so it is more flat and uniform and you don’t have to worry about all the crumbs when you put your frosting on the outside.
And the last step is to cover it with the remaining frosting and add peaches to the outside if you want!

Enjoy!


Tuesday, October 30, 2012

Glitter Crowns from Lace

Here is the Glitter Crown I made for Lillians Birthday.  And I have to say I never thought she would wear it as long as she did.  I was hoping for 1 simple smile and a flash of a camera and that is all I wanted.  The sweet birthday girl gave me a full video while she ate her cake!  That shows how much she loves her peach cake!  I wanted to post how I made it! It is so so so very simple! I hope you make lots!


What you will need:
* Lace - I got mine from Jo-Anns.  The crocheted soaks up the stiffener easier than the nylon kind. You can buy it by the yard or by the spool.  I only needed 18" for Lillians little head so I bought it by the yard. I got 6" longer just encase!  Ya never know!
* Fabric Stiffener
* Metallic Craft Paint
* Paint Brush
* Wax or Parchment Paper
* Fine Glitter (I love Martha Stewarts!)
* Hot Glue Gun
* Scissors
* Small Bowl

Directions:
1. Cut your lace to the appropriate size.  For newborns it is usally 13" - 15".  Lillians was 18" and she is 1 year.  Older girls are usually 20" - 22".
2. Pour your fabric stiffener into a small bowl.
 3. Immerse your lace completely into the bowl soaking the entire length.

4. Wring out the lacy by pulling it through your pointer and middle finger letting the excess stiffener run back into the bowl.

 5. Lay the lace onto a pieces of wax paper (or parchment) and dab the length with a paper towel, removing the excess stiffener so that it isn't clogging the holes in the lace.

 6. At this point you can either let it air dry for about an hour, OR, if you're impatient I heard that you can cheat a little bit.  You can turn your over on the lowest temperature it will go (175), and when it reaches that temperature, turn it off.  Put the wax paper onto a cooling rack and place it into the over and shut the door.  In about 20 minutes it will be dry.  Or you can just wait an hour.  Whatever you want to do.

7. Repeat steps 3-6 three or four times until your lace is stiff enough to stand on its side and sturdy enough to hold its shape.

8. Even though I blotted the lace I still have some glue that got in between my lace so I just got a push pin and poked around until it was like I wanted it.

9. Then peel it off the wax paper and place it on a new piece of wax paper.  You're ready to paint!  Grab your paint and of course pour it into a bowl for easy clean access.  Using a paint brush, paint the backside first and then flip it over and paint the front.

10. Optional: I love anything with glitter and wanted Lillian's crown to have some sparkle!  So, while the paint was wet I sprinkled it with glitter!  I couldn't find the perfect color I wanted at the store so I mixed 3 colors in a bowl and got what the color I was looking for!
11. You'll need to let the crown either air-dry or oven dry completely


12. Once dry the ends tended to be frayed and sharp with all the stiffener on them, so I trimmed them up so they both had a nice smooth edge.

13. Then take your glue gun and add a dab of glue to one end and attach it to the other end.  Try your best to match and overlap the pattern so the connection isn't obvious.

14. Almost Done! Once the ends are attached, take a cup that has a graduated shape (the top is wider than the bottom) and place the crown snugly onto it so that it forms the correct crown shape. (tops is a little wider than the bottom).  I left my crown like that for a day or so because it will continue to stiffen as it "cures".

And Viola!  You're done!


___________________________________________

GLITTERED 1's and HEARTS:

Now if you are wondering about the 1 you can always add any kind of embellishments that you would like.  

If you wanted to add one like mine here is what I did.  
I loved it so much that I also had "1's" all on the buffet table,  hot coco bar, and on the bow as they came in the door.  I decided to make more because they were so fast and easy! :) 

What you will need:
* Cardboard or card stock
* Razor blaze or scissors
* Craft Paint or glue
* Paint brush
* Fine Glitter

1. I used cardboard for the base of my number.  You can also use cardstock as well.  Scott has TONS so I have it at my fingertips.  
 2. Trace what you want to draw on the card board.  
3. Cut it out with scissors or a razor blade.  I used a razor blade.  It makes it a lot cleaner and faster. (Scott usually does this for me, but I did all my "glitter" crafts when he was asleep.  For those of you who know him knows he's TERRIFIED of glitter! So to help keep his sanity I did my glitter crafts in the wee hours of the morn.)
4. BEFORE you paint go ahead and pour out your glitter onto some parchment paper. (this makes it easer and less messy you you do not get paint all over the glitter container)
5. Once you have your object cut out, it's time to paint.  Take any kind of craft paint you have.  I used my metallic paint I used for my crown and painted it on the card board. Paint the side you want to glitter.  It can be a light coat as well.  With fine glitter it doesn't need to be thick  When paint is still wet press the object into the glitter.  (I found it is easier and coats the object more when you press it into the glitter instead of sprinkling it.)  Note: if your object is large you might want to glitter 1/2 way through painting so the paint does not dry.
6. Let the object dry and then paint the other side.  I was impatient and only let it dry for 2 minutes then I did the other side.  It didn't hurt it since the other side was covered with glitter.

And your done!  Here are some of my pictures of some things I did. 

Cake Heart Toppers
The card board worked out GREAT for the toppers.  
Since cardboard has the corrugated center I was able to slip the skewers right in with no problem!

Little 1's by the centerpieces

Large 1's on the buffets.


Have fun!!

Thursday, October 25, 2012

Invite Tutorial

I wanted to share craft ideas and some of the party decorations with y'all! I hope this gives you some good ideas for your future parties you throw!
If you're like me and LOVE free printables just comment and I can email them to you! I can even customize the colors and names.  I am not sure how to do printables that I can attach, but if you want me to send you mine I keep all the designs I make on my computer so if you want me to send them to you I can! Or if you know how to upload them to a blog for someone to print, let me know how and I will! :)

The Invite!
I LOVE making invitations.  If I am on a party committee I always opt to make the invitations!  The hard part is always in the design, not the actual assembly.  This one took me a few days, but once I figured out what I wanted to do it came together real fast.  Another plus is that I used everything from my scrapbook scraps!  I didn't have to buy anything!  So for someone on a budget this was nice.  Plus I only had to make 5 so that helped too! :)

What you will Need:
Cardstock, ribbon, tissue paper, brads, EZ Runner adhesives, Scissors, and paper to print your invite on. 
Optional: Hole Punch, Round Edge punch, 1"Round Punch, hot glue gun/hot glue, 


Assembly:
* Type up what you want your invite to say and what font you want to use! I am a big font lover so fonts are always the hardest to choose for me! If you like this font you can download it from this website. WISH I WERE TALLER FONT (CLICK HERE) 

* After you type up what you want it to say print it off of course on what kind of paper you would like.  I used an ivory white linen paper. 
* Take a piece of card stock and round the edges.  I have one of those round edge punchers so that made it fast and easy.  You can get them from any scrapbook/ craft store for about $5.00 I think.
*  To make the banner all you do is cut out triangles in your choice of color (depending upon your theme). I used 4 different colors.  I cut a few and placed them on my ribbon to see which one I liked the best.  After I chose the one I liked I traced it on all of my colors and cut them out.  They do not have to be all the same size or perfect in cut though.  Mine were not perfect either, and I liked that.
* After your triangles are cut it's time to glue them on to your ribbon.  I used 1/8" ribbon.  Now you can use glue or tape, but I really suggest buying E-Z runner scrapbook adhesives   Again you can get them from any craft store.  The reason these are essential here is because as you can see on the picture the tape is pre-cut and comes off on tiny strips so you just need 1 strip thick!  This makes attaching the triangles on the ribbon faster and ALOT cleaner!  I applied 2 strips along the top of each triangle and it was perfect.  Then you just stick it to the ribbon!
* After all of your triangles are secured, punch holes at the top corners of your card stock.  Slide the ribbon through and either tie a bow or tape on the back.  (if you do not want to attach a back like I did then I would suggest a bow.  If you are attaching a back you can just tape because it will be hidden!
* Now to make the tissue pom poms.  Pick out the color of tissue paper of your choice.  Stack or fold 4 pieces of tissue thick.  Take your hole punch and punch out the circles.  If you do not have one, you can always just trace the circles you want and cut it out.  The hole punch just makes it faster.  If the tissue gets stuck then just trim it up with scissors.
* Make a hole in the middle of the pom pom.  I took a pin and just punch a hole then I took my brad and pushed it through!
* Decide where you want your pom poms to go on your paper and make a hole.  Push your brad through and secure it to the back.  "Fluff" and wrinkle the tissue paper once it is secured to give it texture and height.
* If you are going to have a back to your invite then grab your card stock of choice and trace the invite and cut to fit. 
* I secured my back with hot glue.  I just put 4 large blobs on the corners and pushed to secure.  I found it easier to line up if I secured the top 2 corners then I secured the bottom 2. 

And your done! :)

Here is a picture of the EZ runner Tape so you know what it looks like. 


I will post the other crafts of here soon!

Tuesday, October 23, 2012

Lillian's 1st B'day!

Happy Birthday to Lillian! :)

Our sweet lil girl turned one this weekend!  I swear this has been the fastest year of my life!  I can't believe how fast it went.  You always hear people say that after they have kids, but man.. What the freak happens with time when you have a kid? haha i loved the first year though! I wish all the family spread over the miles could have been here to celebrate her first year with us.  Lillian loved every minute of it!  Mrs. Thang just loooovess attention, and she was the center of it and soaked up every last bit!  You could really tell she loved having everyone there.  She really did have such a great time!  It was written all over her face.  She didn't want anyone to leave! We all just hung out, ate, and Lillian opened her gifts.  Which she did such a good job! We took pictures and videos for y'all to enjoy so it was as if you were here!  I hope you enjoy!

I themed her party after Autumn and of course 1 year old Lillian.  The food was after her favorite foods this year.  Peaches and Corn!  I did peach cake and corn chowder!  And if you know me and read my earlier post of Lake Blanch you know how happy Fall makes me!  I took my sweet moms advice and made her party just like I wanted.  I was talking to my mom one day about what I should do for her party and she said "Keri this is the only time in her life you are going to be able to throw her a party that she doesn't tell you exactly what SHE wants.  Enjoy it and do whatever you wanna do for her!" So I listened well...

Now I'll be honest with y'all... I have become one of those Moms who gets WAY excited and goes crazy with all the small details of decorations and stuff.  I told Scott NOT to tell anyone how much time I spent on thinking about what I wanted to do and my late night craft nights.  I didn't want people to know how crazy I was.  Then the party came and he couldn't hide it (tisk tisk), so he told everyone of my todo lists and bla bla bla.   haha I guess I could blame it on the day job, but really.... I LOVE planning parties! Maybe that's why I love my job so much!  So if you think I'm crazy and spend too much time, your probably right, and I DON'T CARE! :) I had SOOO much fun planning and creating!  I'm really sad it's all over and I don't have anything to think about anymore.  I wish I had money so I could throw a party every month just because I can!  haha That would be the life!  Maybe one day!  Until then.. enjoy Sweet Lillian's 1st Birthday Party!  We did and I hope we captured enough so you can too!  We love y'all!

Lillian opening her Gifts!


Lillian Digging in her cake and spreading it all over her Dad's face, after she did it she went in and gave him kiss! ;)


Some pictures from the night.  Scott and I decided not to take any.  We just wanted to enjoy everything! So thanks family for capturing everything for us! :) I'm still waiting for some.  So I should be adding more later! :)


Getting in on the appetizer action!

Sneaking over to her gifts!
Everyone helping her open her gifts to play!


Smearing cake all over Dad's face!

She loved everything!


Here's some of the decor I had fun making! haha


Tuesday, October 16, 2012

Canning 101 - Fresh Vegetable Soup


Scott and I have decided to start a tradition!

With winter coming up soon, that means no more farmers market..... (NOOOO!) I know! That's what I'm sayin!  What are we going to do?!?  Well we decided to do a little canning to preserve all of those great fresh non processed local vegetables! :)  Scott's sister, Tracy, was nice enough to teach Scott how to can this AMAZING soup last year so we decided to give it a try ourselves! :)  

We ordered all of our stuff like a pressure cooker, victorio 250 food mill, and all the other canning stuff, BUT believe it or not it didn't come in in time! :(  So sweet Tracy saved the day! She let us borrow all of her stuff so we could finish our project over the weekend! (THANKS TRACY!)

And we couldn’t think of a better weekend to Can than General Conference weekend! J  

Scott and I really loved hearing conference in the background while we put up food for the winter.  It just gave our home a wonderful spirit.  While we were working we could hear the words from our leaders, and to be honest it was actually a lot easier to listen intently for 2 hours. We all know how hard it can be at times to focus for 2 hours.  It's sad to say, but its true.  When you are in the kitchen cutting and dicing its so easy to let you mind be filled with the words.  It was such a great weekend!  Hooray to our new tradition! I can't wait to see what we can come the first week in April!

So for those out there who would like to Can, here is a simple and great recipe to put up some great food for the winter or to just have good healthy food on the shelf with no preservatives! Beware, its very simple but time consuming! :)

------------------------------------------------------------

Fresh Vegetable Soup
Canning Equipment:
* Victoria 250 Food Mill
* 23 Qt. Pressure Cooker
* Mason Jar Funnel
* Magnetic Lid Tool
* Jar tong lifter
* 20 quart stock pot
* 20- Pint Mason Jars (with rings and NEW lids) – This recipe makes 20 jars (feel free to double it as much as you would like. We made 60 jars!)

Soup Ingredients:
* 15lbs of Tomatoes (3/4 box)- when you go to your local tomato stand ask for the overly ripe ones.  They are a lot cheaper.  We got our whole box for only $4.00!
* 1- 2lbs bag of carrots
* 1 bag of Celery
* 9 ears of corn (cut off the cob) - we used 12 because we LOVE CORN! 
* 1-1lbs bag of  dry butter beans ( or 2lbs of frozen)
* 1- 5lbs bag of red potatoes
* 3 onions
* 2 packages of Rosemary – Add to taste.
* Coarse salt and ground pepper (to taste)

Directions
1. Soak your butter beans 8 hours in water. (Or just  buy frozen beans if you do not want the dry beans.)
2. Boil your butter beans for 1 - 1 1/2 on medium heat. 
3. Run your jars, lids, and rings through the dishwasher. 
4. Once butter beans are done put them in your large stock pot. 
5. Cut up your carrots, celery, red potatoes, onions and put in the same stock pot.
6. Shuck your corn and cut the corn off the cob.  Put in same stock pot. 
7. Mince your rosemary and add in same stock pot.
8. Run tomatoes through Victoria 250 Food Mill, and put in same stock pot.  The mill will get all the juice out of the tomatoes while separating the seeds and skin.  Scott ran the skin and seeds through a second time and got more juice!
9. Bring soup to a boil.
10. Add Salt and Pepper to taste. 
11. Add in about 3 liters of water to the pressure cooked.  Bring to a boil.
12. While water is coming to a boil in the pressure cooker.  Bring the lids to a boil.  Make sure seal is placed downward.  Once they are boiling take them off the heat and let them sit in the hot water.  Do not let them boil for a while or the seal will break. (DO NOT TOUCH THEM AGAIN!)
13. Fill mason jars with hot water. (The jars will crack if you add hot soup to cold jars)
14. Once pressure cooker is boiling it is finally time to can!  2 people is GREAT here!  Take your jars (prefilled with water) and pour out the water and pour in the soup! Wipe off any spillage from the lip.  Take your nifty magnetic tool and use it to grab your lids out of the hot water and place on your jar.  Screw on the ring, and place in Pressure Cooker. 
15. Repeat step 14 until all jars are in the pressure cooker.  Our pressure cooker held 20 jars at a time.  10 on the bottom and 10 on the top.  Try to place the top jars in between the bottom jars so they do not sit right on top of each jars seal. 
16.  Once jars are in the pressure cooker, place JUST THE LID without the pressure cap on pressure cooker. There is a little plug that will pop up and cause the steam to exit out of a small valve. Once this happens, let the steam vent for 10 minutes.
17.After letting the steam vent for 10 minutes it's now time to put the pressure cap on pressure cooker.  This is where you need to watch your pot A LOT.  Scott and I set our timer for every 5 minutes.  Once you place the cap on the pressure cooker the pressure needs to rise to 10.  Do not let the temperate drop below 10 or go above 15.  If it goes below 10 it will not seal.  If it goes above 15 then some of the soup tends to boil out.  So you may ask… How do I keep it from going under or over?  Well you change the temperate on your range.  If it is getting close to 15 then you need to turn the heat down on your burner and so forth with the temperature going the other way.  
18.  20 jars need to boil for 55 minutes. 
19. After 55 minutes take the pressure cooker off the heat and let the temperate drop to 0.  
20. Once it has hit 0 take the top off the pressure cooker and open it up and let sit for another 10 minutes. 
21.  After it has sat for 10 minutes with the lid off you are now safe to remove the jars.  If you have nifty jar tongs those would be great to use here.  Make sure to put your jars on a warm surface or a towel.  Do not put jars on a cold surface. 
22. Within a couple of minutes you will here a POP!  The jars are sealing!  
23 CELEBRATE! Yay!! you're an official Canner!

------------------------------------------------------------

For those visual learners: 


 What you will need!


1. Soak your butter beans 8 hours in water. (Or just  buy frozen beans if you do not want the dry beans.)

2. Boil your butter beans for 1 - 1 1/2 on medium heat. 


3. Run your jars, lids, and rings through the dishwasher. 


Don't forget to get some great background music/ show going on! 


4. Once butter beans are done put them in your large stock pot. 
5. Cut up your carrots, celery, red potatoes, onions and put in the same stock pot.

6. Shuck your corn and cut the corn off the cob.  Put in same stock pot. 


Watch your back because you never know what the little ones are getting into!


7. Mince your rosemary and add in same stock pot.


8. Grab your box of Tomatoes
 Wash your tomatoes in cold water
 Cut the tomatoes before you put them in your Mill. 
 It makes less mess when you add just a few at a time. 
 My handsome husband gettin the job done! :)

8. Run tomatoes through Victoria 250 Food Mill, and put in same stock pot.  The mill will get all the juice out of the tomatoes while separating the seeds and skin.  Scott ran the skin and seeds through a second time and got more juice!


9. Once everything is in the stock pot bring it to a boil. 
10. Add in salt and pepper to taste.

 While your soup is coming to a boil - get your station set up.  


11. Add in about 3 liters of water to the pressure cooked.  Bring to a boil.


12. While water is coming to a boil in the pressure cooker.  Bring the lids to a boil.  Make sure seal is placed downward.  Once they are boiling take them off the heat and let them sit in the hot water.  Do not let them boil for a while or the seal will break. (DO NOT TOUCH THEM AGAIN!)


13. Fill mason jars with hot water. (The jars will crack if you add hot soup to cold jars)


14. Once pressure cooker is boiling it is finally time to can!  2 people is GREAT here!  Take your jars (prefilled with water) and pour out the water and pour in the soup! Wipe off any spillage from the lip.  Take your nifty magnetic tool and use it to grab your lids out of the hot water and place on your jar.  Screw on the ring, and place in Pressure Cooker. 


15. Repeat step 14 until all jars are in the pressure cooker.  Our pressure cooker held 20 jars at a time.  


16.  Once jars are in the pressure cooker, place JUST THE LID without the pressure cap on pressure cooker. There is a little plug that will pop up and cause the steam to exit out of a small valve. Once this happens, let the steam vent for 10 minutes.


17.After letting the steam vent for 10 minutes it's now time to put the pressure cap on pressure cooker.  This is where you need to watch your pot A LOT.  Scott and I set our timer for every 5 minutes.  Once you place the cap on the pressure cooker the pressure needs to rise to 10.  Do not let the temperate drop below 10 or go above 15.  If it goes below 10 it will not seal.  If it goes above 15 then some of the soup tends to boil out.  So you may ask… How do I keep it from going under or over?  Well you change the temperate on your range.  If it is getting close to 15 then you need to turn the heat down on your burner and so forth with the temperature going the other way.  


18.  20 jars need to boil for 55 minutes. 

19. After 55 minutes take the pressure cooker off the heat and let the temperate drop to 0.  

20. Once it has hit 0 take the top off the pressure cooker and open it up and let sit for another 10 minutes. 

21.  After it has sat for 10 minutes with the lid off you are now safe to remove the jars.  If you have nifty jar tongs those would be great to use here.  Make sure to put your jars on a warm surface or a towel.  Do not put jars on a cold surface. 


22. Within minutes you will hear the jars POP!  They are sealing shut for you! 

Now CELEBRATE! -- Yay!! you're an official Canner!

This makes 20 jars! If you want to make 60 like us, repeat steps 1 - 21 two more times.  Or just boil and do everything at once, and save your soup for when the pressure cooker is done! You will need a LARGER stock pot of course.  

HAPPY CANNING!